in Security
Website hacked – what to do?

Repairing a hacked website is probably one of the rarest tasks for developers - but a very important one. In order to be able to react quickly and competently in case of emergency, we have compiled our experiences in the following comprehensive guide.
Worst case scenario for website owners – the website has been hacked. Now it’s time to act immediately! Because personal or confidential data is at risk. To prevent a website hack from becoming a nightmare, you can take precautions and act prudently. Find out how best to proceed in our 9-step action plan.
Because what counts is not only knowing how to recover the website, but also how to communicate with the website owner at that moment. The right approach will save you money and nerves.
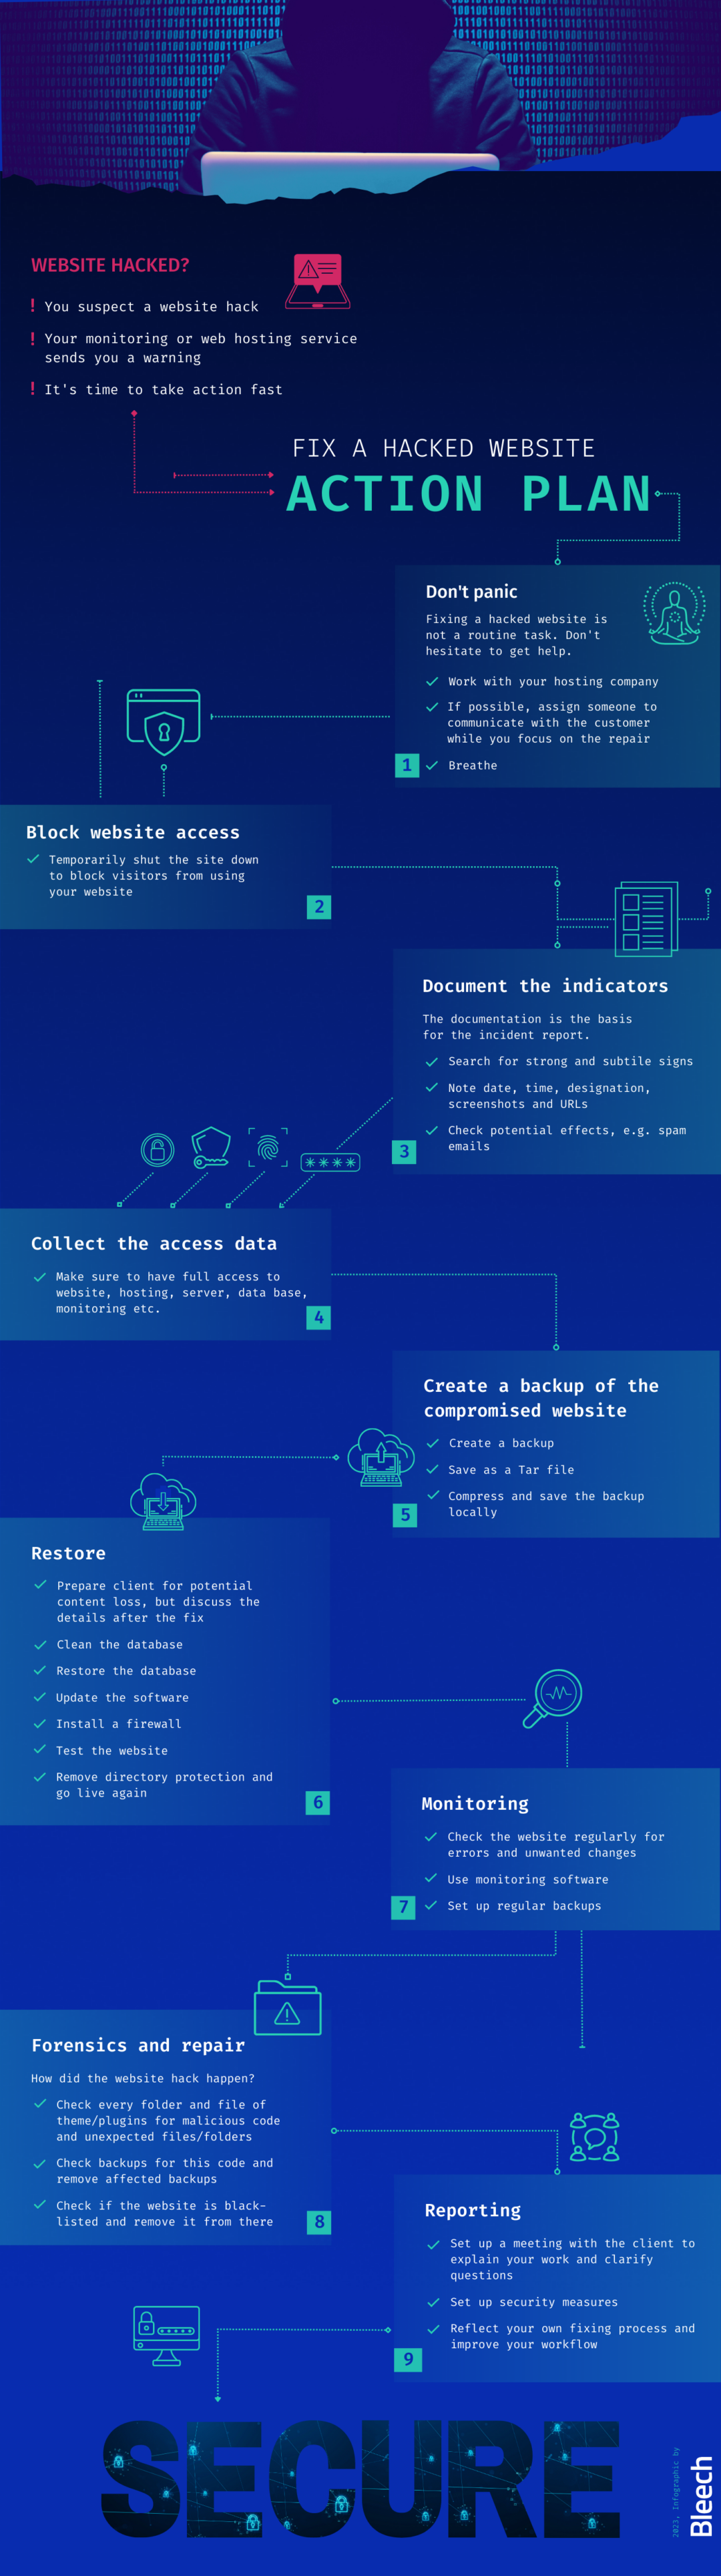
Follow these 9 steps
- Don’t panic and build a team
- Block website access
- Document the indicators
- Collect all the access data
- Create backup of the compromised website
- Restore the website
- Monitoring
- Forensic
- Reporting
We also illustrate you the action plan in an infographic. Save it so you can see at a glance what to do if the worst happens!
Step 1
Don’t Panic

If you discover that your website has been hacked, you need to act quickly to minimize the damage. But no matter what has happened or could happen, first things first:
- Take three deep breaths.
- Accept the situation.
- Now start fixing the problem.
Work together as a team
A website hack is not a routine task. Therefore, don’t be afraid to get help. If you’re working alone, it’s best to contact your web developer or the website’s hosting provider immediately. If your client website is involved, you now have to juggle client and focused work.
If you have a team at your agency or company, we recommend that you define responsibilities before the emergency so that you can act quickly.
Create a repair team
One option is to create a repair team consisting of a repair manager and a repair developer.
As a repair manager, you know the project and are solely responsible for communicating with your customer. You inform him about:
- the current status
- the next steps
- the fixed website
- documentation
- content loss
- further actions
The repair developer focuses exclusively on restoring the website. He communicates every further step with the repair manager and doesn’t have to worry about panicking or angry customers. This gives him the peace of mind he needs to work quickly and cleanly.
Step 2
Block access to the site
Instantly add directory protection to the site to prevent visitors from accessing the site.
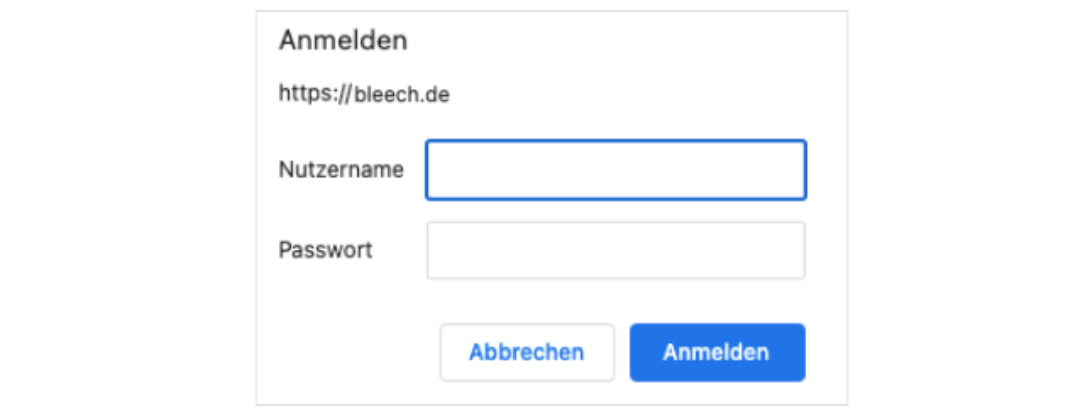
Screenshot directory protection
Step 3
Document the indicators
There are obvious signs that a website has been hacked. However, some signs are not so obvious and are more difficult to detect. If you suspect a hack, you should take a close look at the website.
- Create a document and note down everything you notice. The documentation will later serve as the basis for your incident report.
Strong indicators
- Strong decrease in website traffic
- Strong increase in traffic (e.g. without running ad campaigns)
- Content that does not belong there
- Unusual meta titles/descriptions
- Defaced pages
- Hoster has disabled the website
- Browser warnings
- Website speed is unusually slow
Subtle indicators
- Owners cannot log in
- Unwanted redirects
- Website has been flagged for malware distribution
- Visitors to your customer’s website tell the website owner that something is wrong
- Unauthorized behavior (e.g., creating new users)
- Security plugin alert
- Ask the person who suspects the hack what leads them to believe it:
- What do you see that leads you to believe you’ve been hacked?
- When did you notice this problem?
- What actions have been taken recently?
- Has an update been installed recently?
- Have any changes been made to the website/server/database/domain?
How could the hacker attack have happened?
- Summarize your assumptions about how the hacker attack could have happened and give reasons for them.
Documentation of the incident
- Record the further course of events chronologically.
- Begin each entry with the date, time, and name.
- Take screenshots for the status before and after each change.
- Paste them into the document with a description in the caption (e.g., link to the website)
- Also use markers for better visualization (e.g. red arrows)
- Note URLs
Step 4
Collect all the access data
Now you have recorded the status quo and can proceed with the repair of the website.
- To proceed as smoothly as possible, get all the access data for the website:
- Access to the hosting admin panel (e.g. cPanel, Plesk, etc.)
- Admin account for WordPress (Super Admin for multisite installations)
- SSH access to the server
- Access to database
- Access to the deployment system
- Access to Git repository
- Access to external monitoring/backup tools
Step 5
Create a backup of the compromised website
- Create a backup of the hacked website before importing a new backup or changing anything on the website.
The backup copy of the current version can be useful later for investigations and documentation.
Create a tar archive
- Combine all files and databases into one large Tar archive.
We recommend using Tar for backup so that the original user rights are preserved. When unpacking later, the “-p” option must be used to enable this feature. With Zip, this feature is not available. When extracting the files, try to keep the same ownership rights as in the backup. You can use the “-same-owner” option for this.
Compress the backup
- It’s best to compress the backup, e.g. with gzip (“-z” option).
In a terminal window you can use the following command to backup and compress a directory including the original user permissions:
tar -cvzf client-name_www.compromised-website.com-2023-01-26-11-11-HACKED.tar.gz ./folder-with-files-and-database-dumpSave the backup
- Save the backup locally for your own purposes and in a place where you or your colleagues can access it, e.g. Google Drive.
Step 6
Restore the website
Now it is time to completely delete the compromised website and restore it with an older, clean version on the server. The prerequisite for this is an older, uninfected backup. And – even now – don’t panic. Take another deep breath and calmly get to work.
To do this, find out from which day the first sign of a hack is. This can be, for example, the date stamp of a modified compromised file, or the modification date of a post on the website with unwanted content. Choose a backup from the previous day or older.
If you cannot find a reliable date, proceed to step 8 (Forensics) first. Keep the website offline until you are sure that you have found a clean backup.
- Your customer is not allowed to work on the website now. He’s also not allowed to log in while you’re fixing it. Only when you are done, he can continue working.
Inform your customer
- Before applying the backup, it is essential to inform your customer about the further procedure.
If your customer is actively running the website and has recently updated content, content may be lost. The restored website will not be up to date.
The lost content could possibly be restored. However, this work can be very costly. It may be more efficient to re-post the lost content. However, to avoid stress now, you should discuss the content restoration strategy with your client only after the backup has been applied and the website is fully functional again.
Clean up the database
- Remove all files and delete the database. Then reset all passwords for server and database.
Restore the backup
- Import the supposedly clean backup of the files and database on the server.
- If you change the name and the access data of the database, you must adjust these data in the wp-config.php or .env file.
- Finally, change the security keys and salts in wp-config.php.
The website should now be accessible to you again. Finally, check if you can log into the backend to check the site for possible updates.
Update WordPress Core, Plugins and Themes
Bring the entire website up to date. If there are security concerns with a WordPress plugin that is no longer being updated, for example, you should remove it and discuss an alternative with your client in a follow-up meeting.
Install a security plugin / firewall
- Firewall and plugins
- Reduce file permissions to a minimum (start with the hardest setting and relax it later only if necessary).
- Reset all user passwords.
- Reset all server accesses and grant new accesses only if necessary.
- Check linked systems and your own computer for possible signs of unauthorized access.
Test the website
- Take a close look at the website and check its functions.
- Does the website look ok?
- Does everything work as it should?
- Do the forms work?
Remove the directory protection
- Release the website to the public again and inform your client about this step.
Now your client also has the task of logging in, testing the site, and looking for any unintended changes. It is a good time to make a backup of the current state. After all, if the backup that was uploaded was not clean, it will be easier to identify the cause after another hack.
Step 7
Monitoring of the website
- Over the next few days, regularly monitor whether the website is running smoothly.
Check it once or twice a day in the beginning. Monitoring plugins like VRTs – Visual Regression Tests automate this process for you.
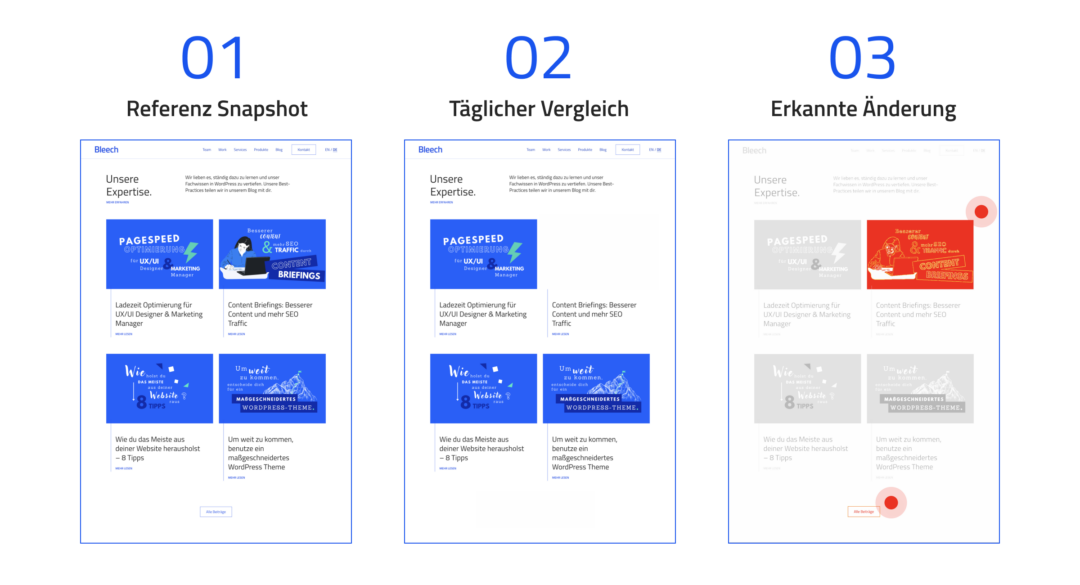
VRTs – Visual Regression Tests creates and compares screenshots to detect unwanted changes automatically.
As long as you have not found the cause of the hack, it is possible that the website is still affected. It is possible that the same symptoms will reappear later or that other symptoms will appear.
This is a sign that your data is not clean and you need to use much older backups to restore it. Always inform your client about the monitoring and the results.
Schedule regular backups
- If you haven’t set up regular automatic backups yet, now is the time.
We recommend that you keep the oldest backup for at least 60 days and make daily backups.
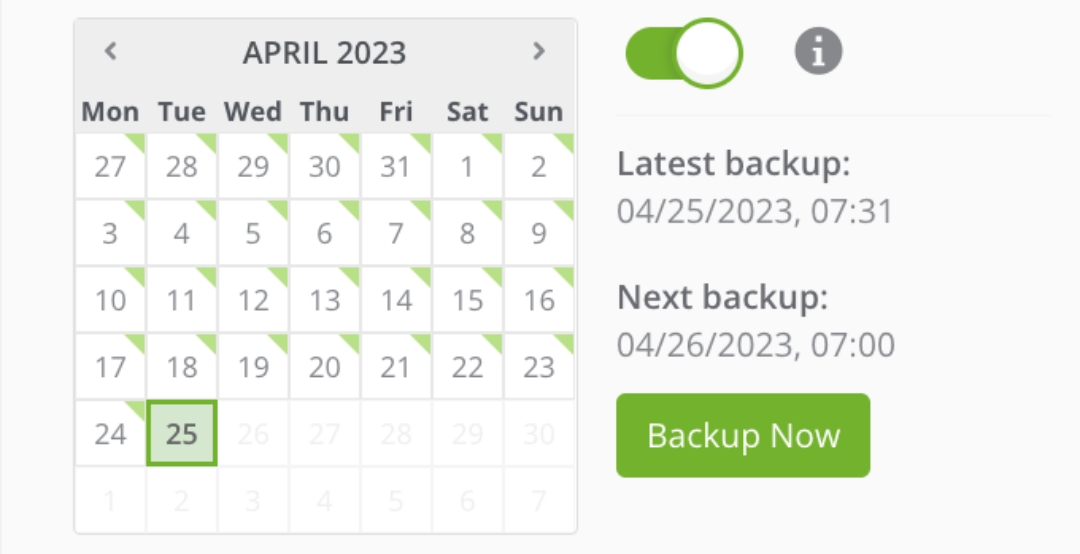
A backup manager makes it easy to manage daily backups.
Step 8
Forensics and repair
- Finally, it is still up to you to find out what was hacked and why. What do you need to do?
- Check possible log files that your hoster has provided you with. Often, they contain information about files where malicious code was found.
- Check every folder and file of the theme and plugins for malicious code, unexpected files/folders, permissions and database tables.
- Create a file comparison between the hacked code and a significantly older backup to identify compressed files.
- Search for security vulnerabilities in plugins or themes using
- If you were able to find the security issue, also check if it is included in your backups.
- Remove all compromised backups.
Check if the website is already blacklisted and remove it from there, e.g.:
- Hosting service
- Google Search Console
- McAfee SiteAdvisor
- Yandex Webmaster
step 9
Reporting
After all the excitement, you should write a report explaining all the details of your work in chronological order. If possible, also arrange a meeting with your client to go over the report together and clarify any questions.
Set up security measures
How can your client protect themselves from unauthorized access to their website in the future? At the meeting, outline measures your client can take on their own and present options you can do for them.
Website security measures include:
- Ensure regular updates of WordPress, plugins and themes
- Passwords: Change all passwords regularly and introduce password rules
- 2FA: Introduce two-factor authentication
- Review security measures that already exist and introduce additional measures
- Offer security workshop for employees
Reflection
Draw your personal feedback from this experience as well.
- How can I better prepare for the next hack?
- How can I better protect websites and detect hacks more quickly?
- What help can I offer my customer in the future?
You are currently viewing a placeholder content from YouTube. To access the actual content, click the button below. Please note that doing so will share data with third-party providers.
More InformationTo learn more about making a WordPress website secure, listen to the podcast episode.
Conclusion: What to do if your website has been hacked?
A hacked website doesn’t have to become a nightmare if you prepare for a potential attack and take the right steps in case of emergency. Always stay in close contact with your customer and inform them regularly about the next steps. Focus on your work during recovery and forensics and document everything for later.
We hope we could help you with our experience! Let us know what challenges you’ve faced in this area so far. Tips always sound helpful in theory, but they don’t always work in practice. Feel free to share this article with others and don’t forget to download the action plan to be prepared for a hacking attack.
I have been hacked, what should I do?
Act immediately and get help. Call your hoster or your web developer to fix the hacked website and prevent further damage. Important steps are now:
- Block the access to the website.
- Document the indicators of the hack.
- Create a backup of the compromised website.
- Restore the website.
- Monitor, if the website runs smoothly.
- Find out what was hacked and why.
- Set up security measures.
I think my website was hacked, but I don’t know anything about programming.
Call your web developer/agency or hosting provider immediately. In any case, get help and do not touch the page again until then.
Can I get a virus from visiting a website?
If you visit a hacked website, you run the risk of downloading malicious code to your computer or catching a virus. This can lead to personal data being stolen (e.g. usernames, passwords, banking information ) or performance problems, data loss or even a complete system failure. An up-to-date anti-virus program can help.